
This year has been wild, and this past month has seen such a rapid shift in our current reality. One thing is for sure though, life is going to keep on going. For this month’s “thirty things” post I wanted to give you some tips for taking your own photos. There will be big milestones, and babies being born. These are events you would normally hire a photographer for, but can’t due to stay at home orders. So here are thirty tips for taking photos at home, in the hospital if you’re having a baby, and just to use in general to better document your family. 🙂
General tips for taking photos at home
- Try to use natural light as much as possible. This doesn’t mean your images have to be light and airy if you don’t want them to be. Natural light is softer and more forgiving than indoor lights. If it’s in the evening, indoor lights are of course fine.
- Tripods, self timers and remotes can be extremely helpful for including yourself in photos. Most smart phones have a self timer in the camera app, so you don’t have to have a DSLR to do this. I love doing this because I feel like I’m in the moment versus being the one to capture it.
- Interval timer shooting – along the lines of a tripod and timer, with most DSLR cameras you can set the tripod and camera up, and then set it to take a photo every minute, three minutes, five minutes or whatever your choice is. This can be extremely helpful for sitting down to playtime with your kids or reading them a story, and to be used on Christmas morning. You can set the camera up, make sure the photos are framed the way you’d like, and then forget about it. You aren’t fussing with a remote or running back and forth to the timer.
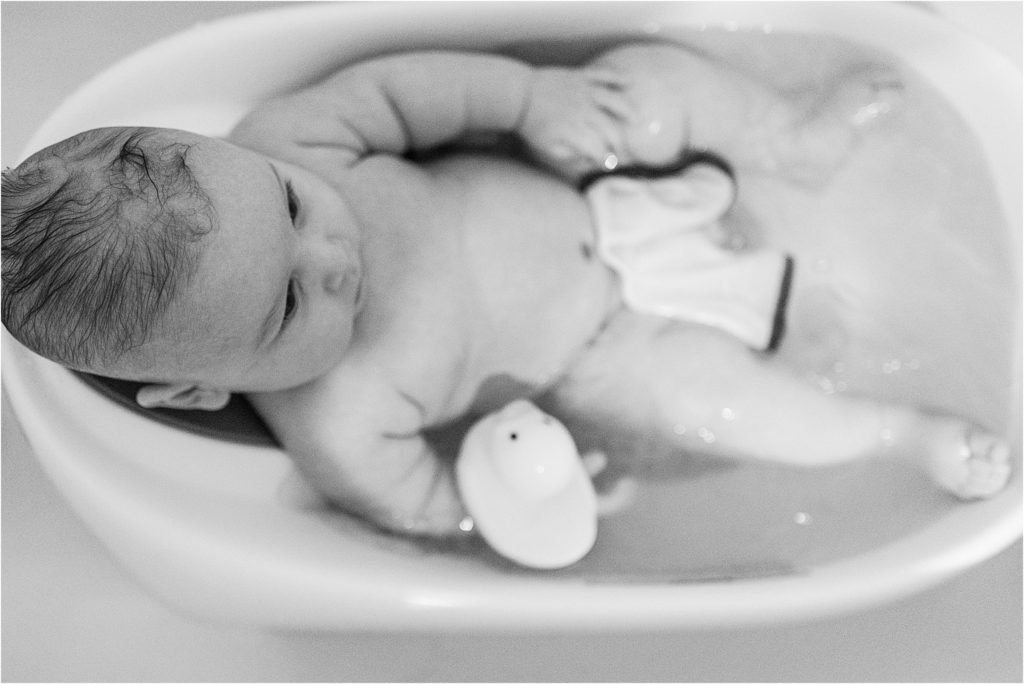
- Change perspective. A bird’s eye view, from behind or below your kiddos – you don’t always have to take a photo straight on.
- If using a DSLR make sure to pay attention to your settings. I’ve been guilty of trying to move to fast and taking a too dark photo inside because my camera is still set up for outside or a too bright outside photo because my camera is set up for inside. I set my aperture first, and for photos of just Wynn, it’s around 2.0 – 2.2. If it’s me and Wynn or Justin and Wynn, it’s usually 2.5 to 2.8, and then I set my shutter speed (always at least double the longest length of your lens), and then my ISO.
- Editing your photos can help them to feel finished or more polished. You can get a subscription to Lightroom for your laptop or desktop for $9.99 a month, or the Lightroom mobile app is free. You might have to play around in it for a bit to get the hang of it, but it’s worth it!
- When composing your photos try to keep the rule of thirds, leading lines and framing your subject in mind. The rule of thirds is to imagine breaking an image down into thirds, both horizontally and vertically, so that you have 9 parts. This creates four points of interest where the lines intersect or four lines that are useful to position subjects to create more visually interesting photos.
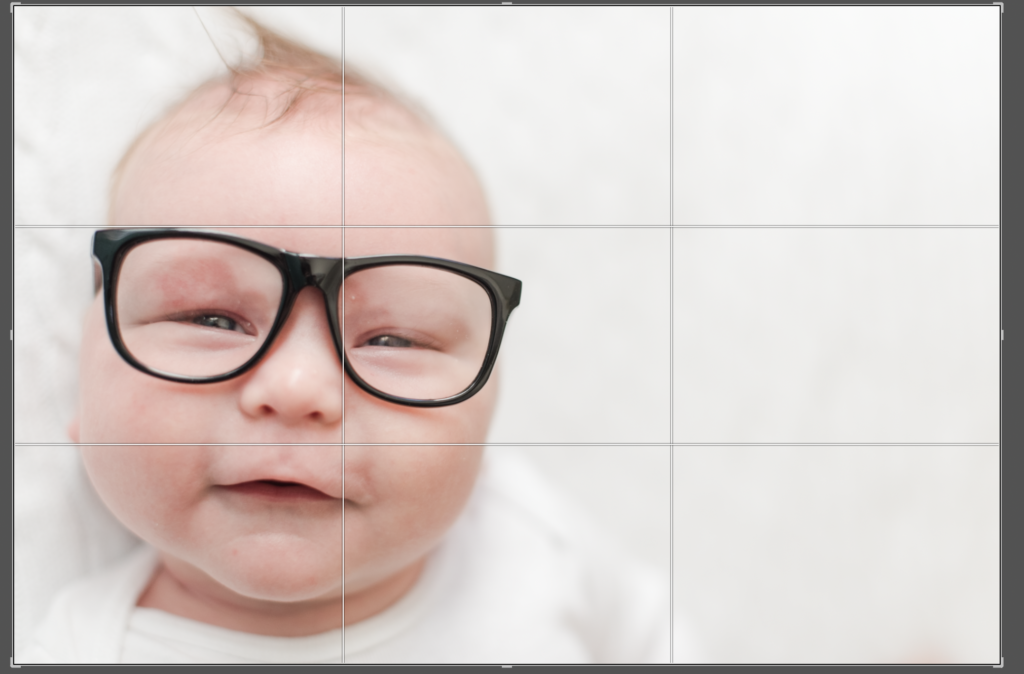 Leading lines are when a line in the frame draws your eye to the subject. Framing is (simply enough) when you use elements in the photo to frame your subject.
 - Eliminating distractions can help you focus on the subject of the photo. Bright colors in the background or a bunch of things on the floor or counters are examples of distractions… and also examples of everyday life. 🤷🏻♀️
- Don’t hesitate to just capture things as they are, as well. If creating a clean, simple background means you miss the moment, then it’s not worth it.
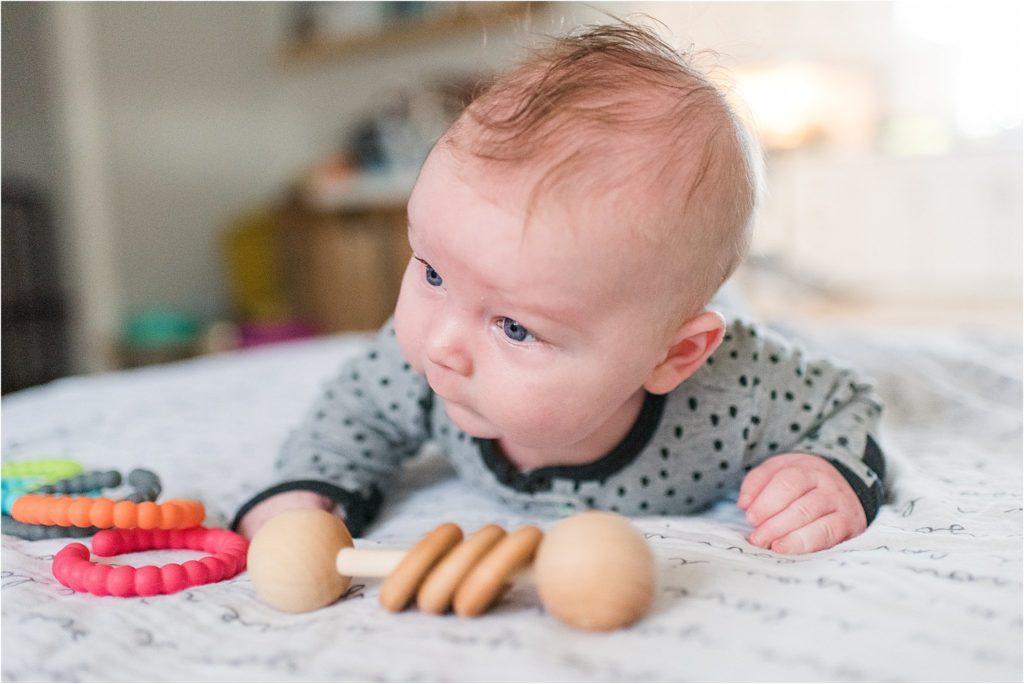
- When using a DSLR or selecting a focus point, focus on the eyes – or if from the side the eye closest to you.
For birth and fresh 48 photos
- Try to take photos during the day when there is plenty of window light.
- Turn off the hospital lights and try to use only the window light, if you can! Mixing natural light, which is softer and more forgiving with the yellow indoor light can make photos hard to edit.
- Position your baby facing the light coming through the window. Try to clean up the area you’ll be taking photos in to eliminate distractions. I know it’s hard when you feel like you have so much stuff and so little space.
- Don’t shoot towards the window. Shoot with the window to your side or to your back. Just be careful not to block the light coming through!
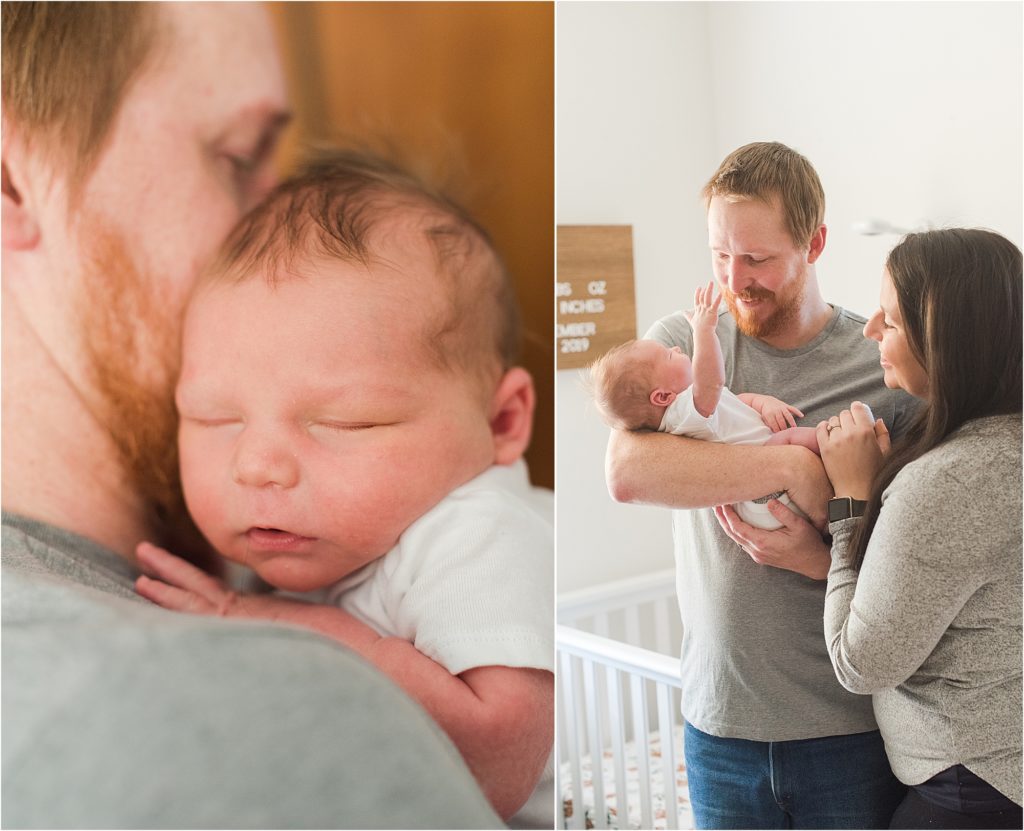
- Don’t photograph aiming up the babies nose. Shoot down, from above or the side of the baby.
- Get close! Thats where the details are! Fresh skin and tiny fingers and toes are important! Get photos of the hair on top of their head, their little eyelashes resting on their cheek, that tiny nose – it all changes so fast.
- If you are one of my clients and you would like me to edit any photos, I will do so free of charge. Just text me the photos and I will edit them and text them back.
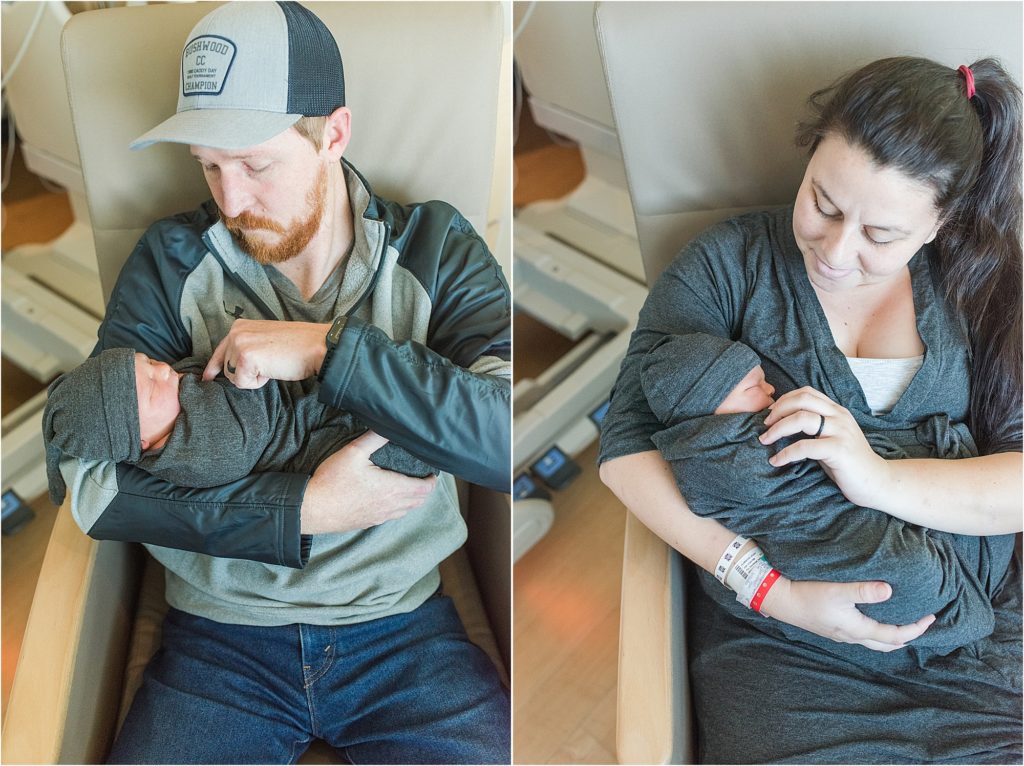
- If you want photos of your baby swaddles up, ask your nurse to swaddle the baby for you. They are the BEST at this. I still have no idea how our nurses were able to contain Wynn so well.
- Make sure to get photos WITH your baby, not just of your baby.
- Ask your nurse to take a photo of all of you in your going home outfits. We did this before being discharges. It’s one of my favorite photos of the three of us – even if I am swollen from fluid retention.
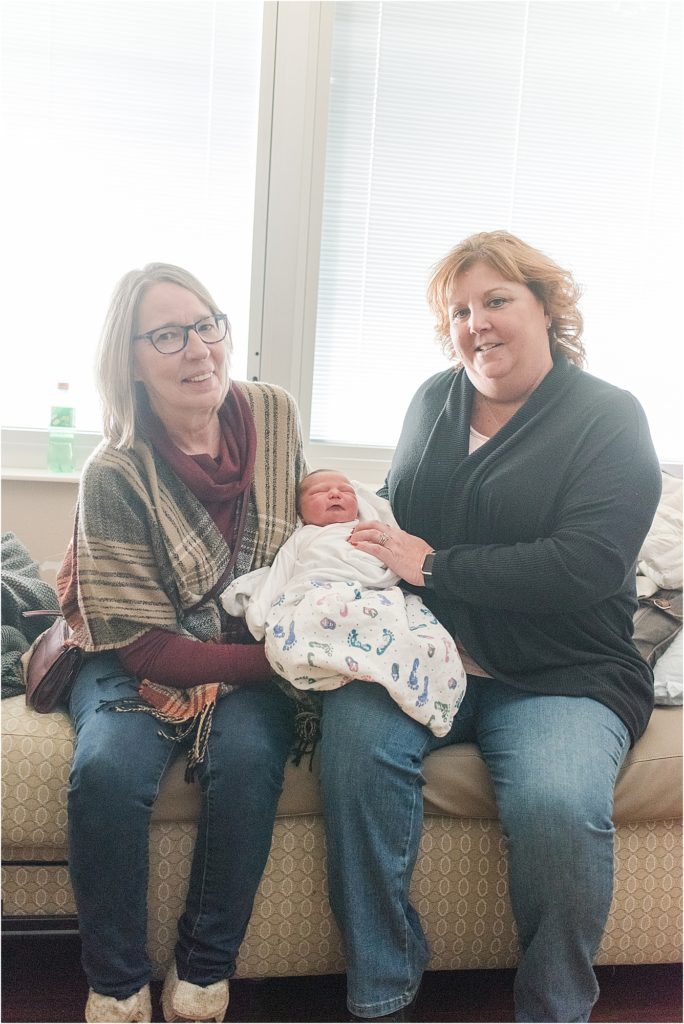
I was laying in bed when I took this photo. The light is behind them because Wynn was delivered the day before, and I couldn’t get up.
Tips for taking photos at home of your newborn
- Neutral colors are timeless and work great for mom and dad too.
- Focus on the eyes (even if they are closed)
- Simplicity is your friend. Don’t try to do too much with props or outfits. Pick a couple things, and that doesn’t mean they have to be in the same photo. If you want a letter board or sign with your baby’s stats, great, but you don’t need 15 other props and stuffed animals in the photo.
- The baby should be the focus of the photos. Their sleepy little face, their hair, their hands and feet, those cute noses – you’ll want to capture it all because it changes so fast.
- Take the newborn photos within the first two weeks when baby mostly sleeps all the time, and preferably right after a feeding when they are full and happy.
- Mom, you’ll probably want to wear layers as they will be the most forgiving for your transitioning body, and you’ll be less likely to pick yourself apart in the photo.
- Turn up the temperature in the house, and maybe even use a space heater near (but not too close) to the baby – especially if they are naked or only in a diaper. Newborns cannot regulate their temperature, and it is typically advised to keep them dressed similarly to you plus a layer. Just pay attention and check baby’s back/chest to make sure they aren’t too warm or too cold.
- You can try to create a simple background using a large, solid colored blanket draped across your ottoman and the back of your couch. Most of the props you see in newborn photos are specifically for newborn photos. They are filled with weights and padding for the baby’s comfort and safety.
- Always stay within arms reach of your baby. Sometimes those startle reflexes can case them to move about, and we always want your baby to be safe.
- Please do not suspend the baby in any blankets or props that hang them off the ground. These photos are created by making a composite image in photoshop. It’s two to four photos taken and merged together to always keep a hand on the baby and make sure they stay safe.
Want to get in touch?
I hope you enjoyed all thirty tips for taking photos at home. If you’d like to book your session or wedding, you can contact me at kelsey(at)kelseyalumbaugh(dot)com. Check out my Instagram @kelseyalumbaugh ! And like me on Facebook to see the latest blog posts. 🙂 If you’re curious about the investment, you can check that info out here, but please feel free to reach out so we can better address your photography needs.
filed under
April 8, 2020
POSTED ON


[…] Seattle. Putting all of those photos into the yearbook would make it impossible to order. Check out Wednesday’s post with tips to take photos at home if you’d like to take better photos of your everyday life, […]